How to Connect Email and Bank Accounts to Synceipt
· 5 min read · How-To Guides
Connect your email and bank accounts to Synceipt in minutes. We support Gmail, Outlook, Yahoo, Plaid, PDF statements, and manual entry.
Synceipt needs to pull data from two places: your receipts (email) and your transactions (bank). This guide shows you how to securely connect both without needing to remember passwords or give us direct access to your accounts.
Why Connection Methods Matter
We offer multiple ways to connect so you can choose what works for your lifestyle:
- Email → Most receipts arrive here automatically
- Banks (Plaid) → Real-time, always-up-to-date transactions
- PDF Statements → Upload manually whenever you like
- Manual Entry → Full control, no external connections
Connecting Email Accounts
Email is where most purchase receipts land. Synceipt can extract receipts from Gmail, Outlook, and Yahoo using secure OAuth authentication (we never see your password).
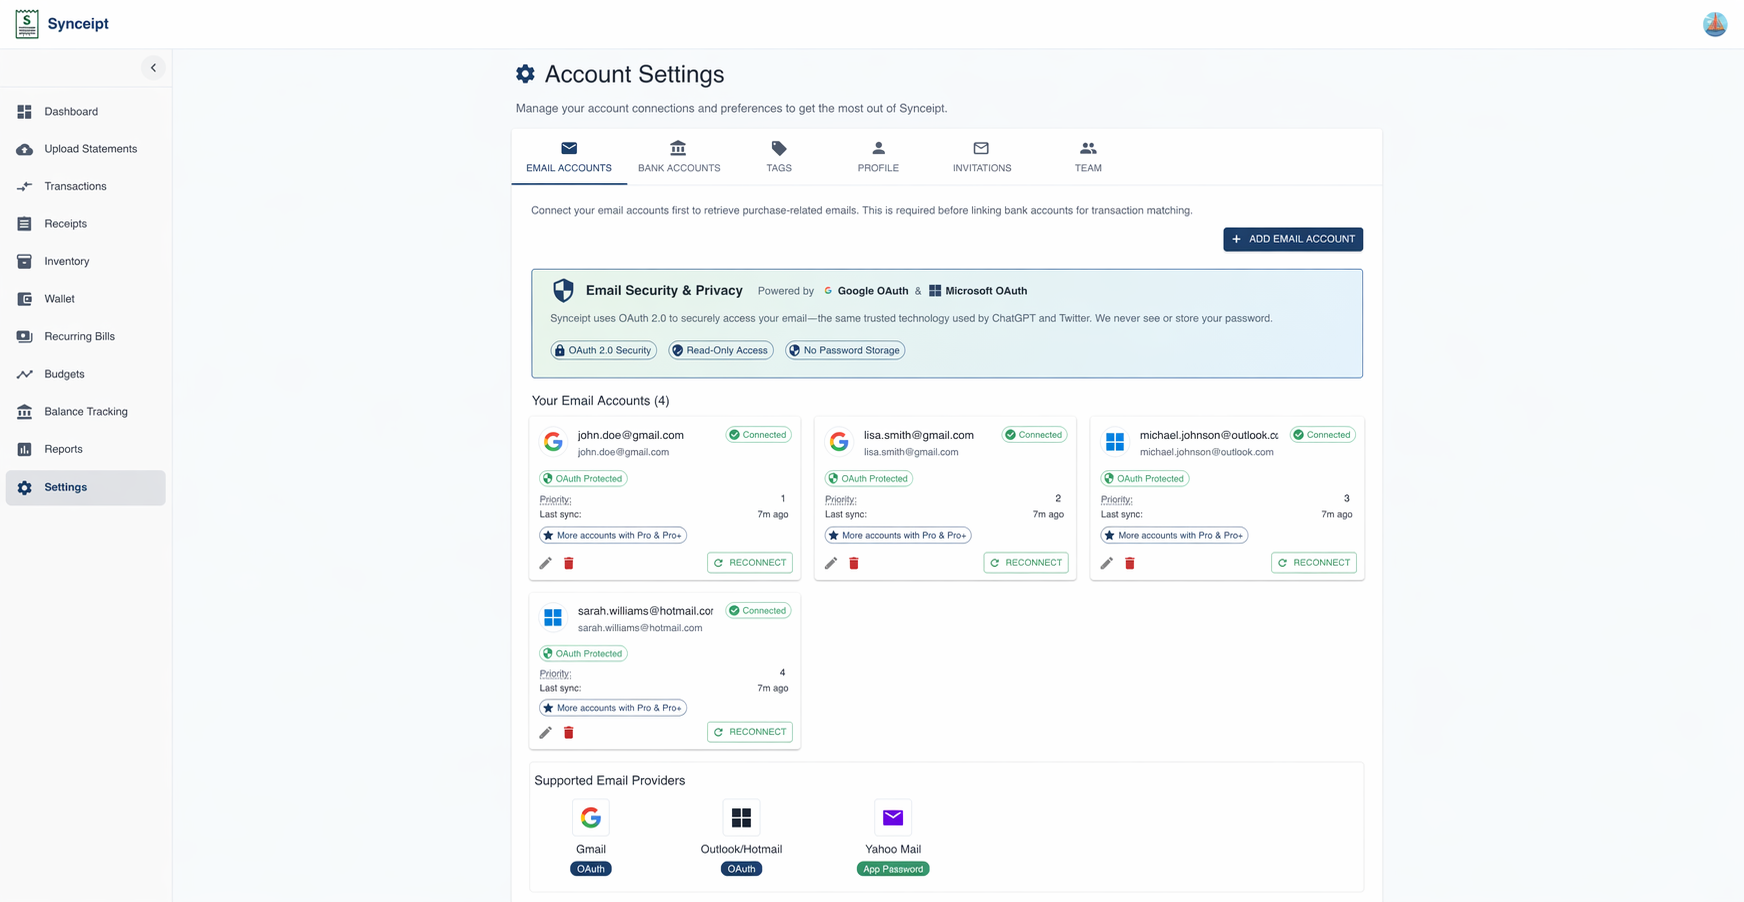
- Open Synceipt and go to Settings → Email Accounts
- Click 'Add Email Account'
- Choose your email provider: Gmail, Outlook, or Yahoo
- Click 'Authorize' and log in through your email provider's secure login
- Grant permission for Synceipt to read your emails (we don't delete or modify anything)
- Once authorized, receipts in your inbox start syncing automatically
Security: We use OAuth 2.0, which means we never store your email password. We only read your inbox — emails are never deleted or modified.
Connecting Bank Accounts (Plaid)
For real-time transaction data, connect one or more bank accounts via Plaid. Plaid is the secure intermediary used by thousands of financial apps.
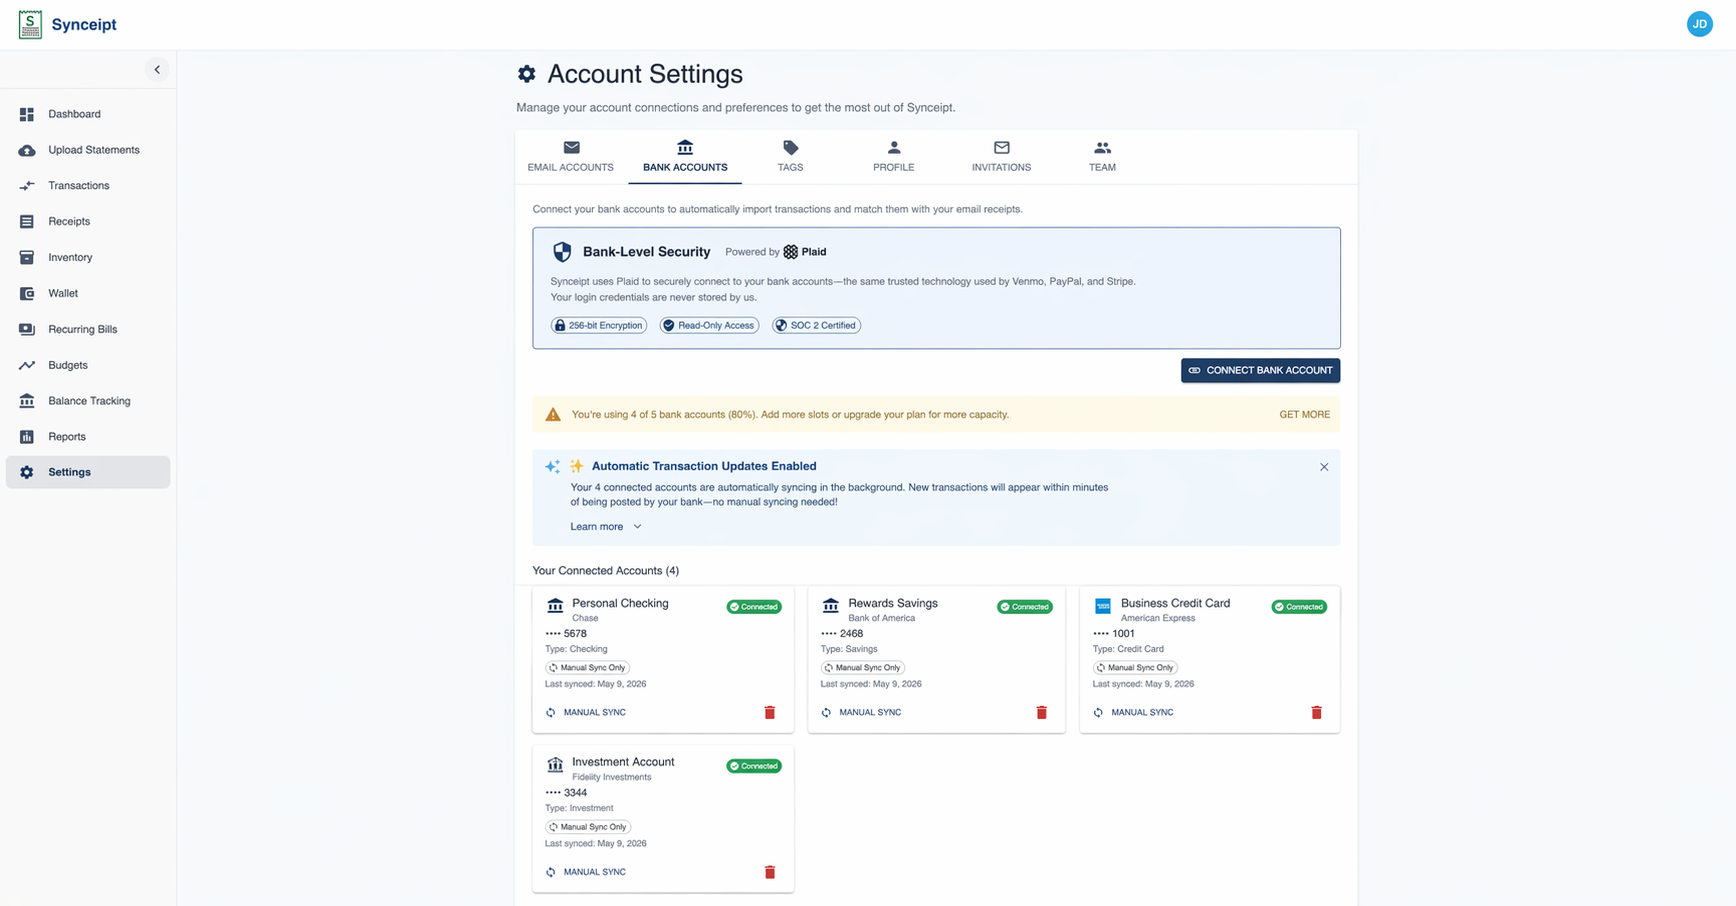
- Go to Settings → Bank Accounts
- Click 'Add Bank Account'
- Search for your bank by name and select it
- Log in through Plaid's secure window (same login you use for your bank's website)
- Grant permission for Synceipt to access your accounts (read-only, not write-access)
- Transactions sync automatically and continuously update
You can connect as many banks as your plan allows. Each connection is independent, so you can remove one without affecting others.
Multi-Account Banks: If your bank allows connecting multiple sub-accounts (e.g., checking + savings), select all the accounts you want during setup.
Uploading Bank Statements (Manual)
Don't want to connect your bank account? No problem. You can upload PDF bank statements instead.
⚠️ Privacy First: Before uploading any statement, redact sensitive information (account numbers, routing numbers, SSN, full names, addresses). This protects your privacy — Synceipt only needs the transaction data, not your full PII.
- Download a PDF statement from your bank's website (usually under 'Statements' or 'Documents')
- In Synceipt, click 'Upload Statements' in the left sidebar to open the upload page
- Review the 'How it works' section to understand what data Synceipt will extract
- Select your redacted PDF file using 'Select File' or drag-and-drop
- Synceipt's AI extracts the transaction data automatically
- Review and confirm the extracted transactions before importing
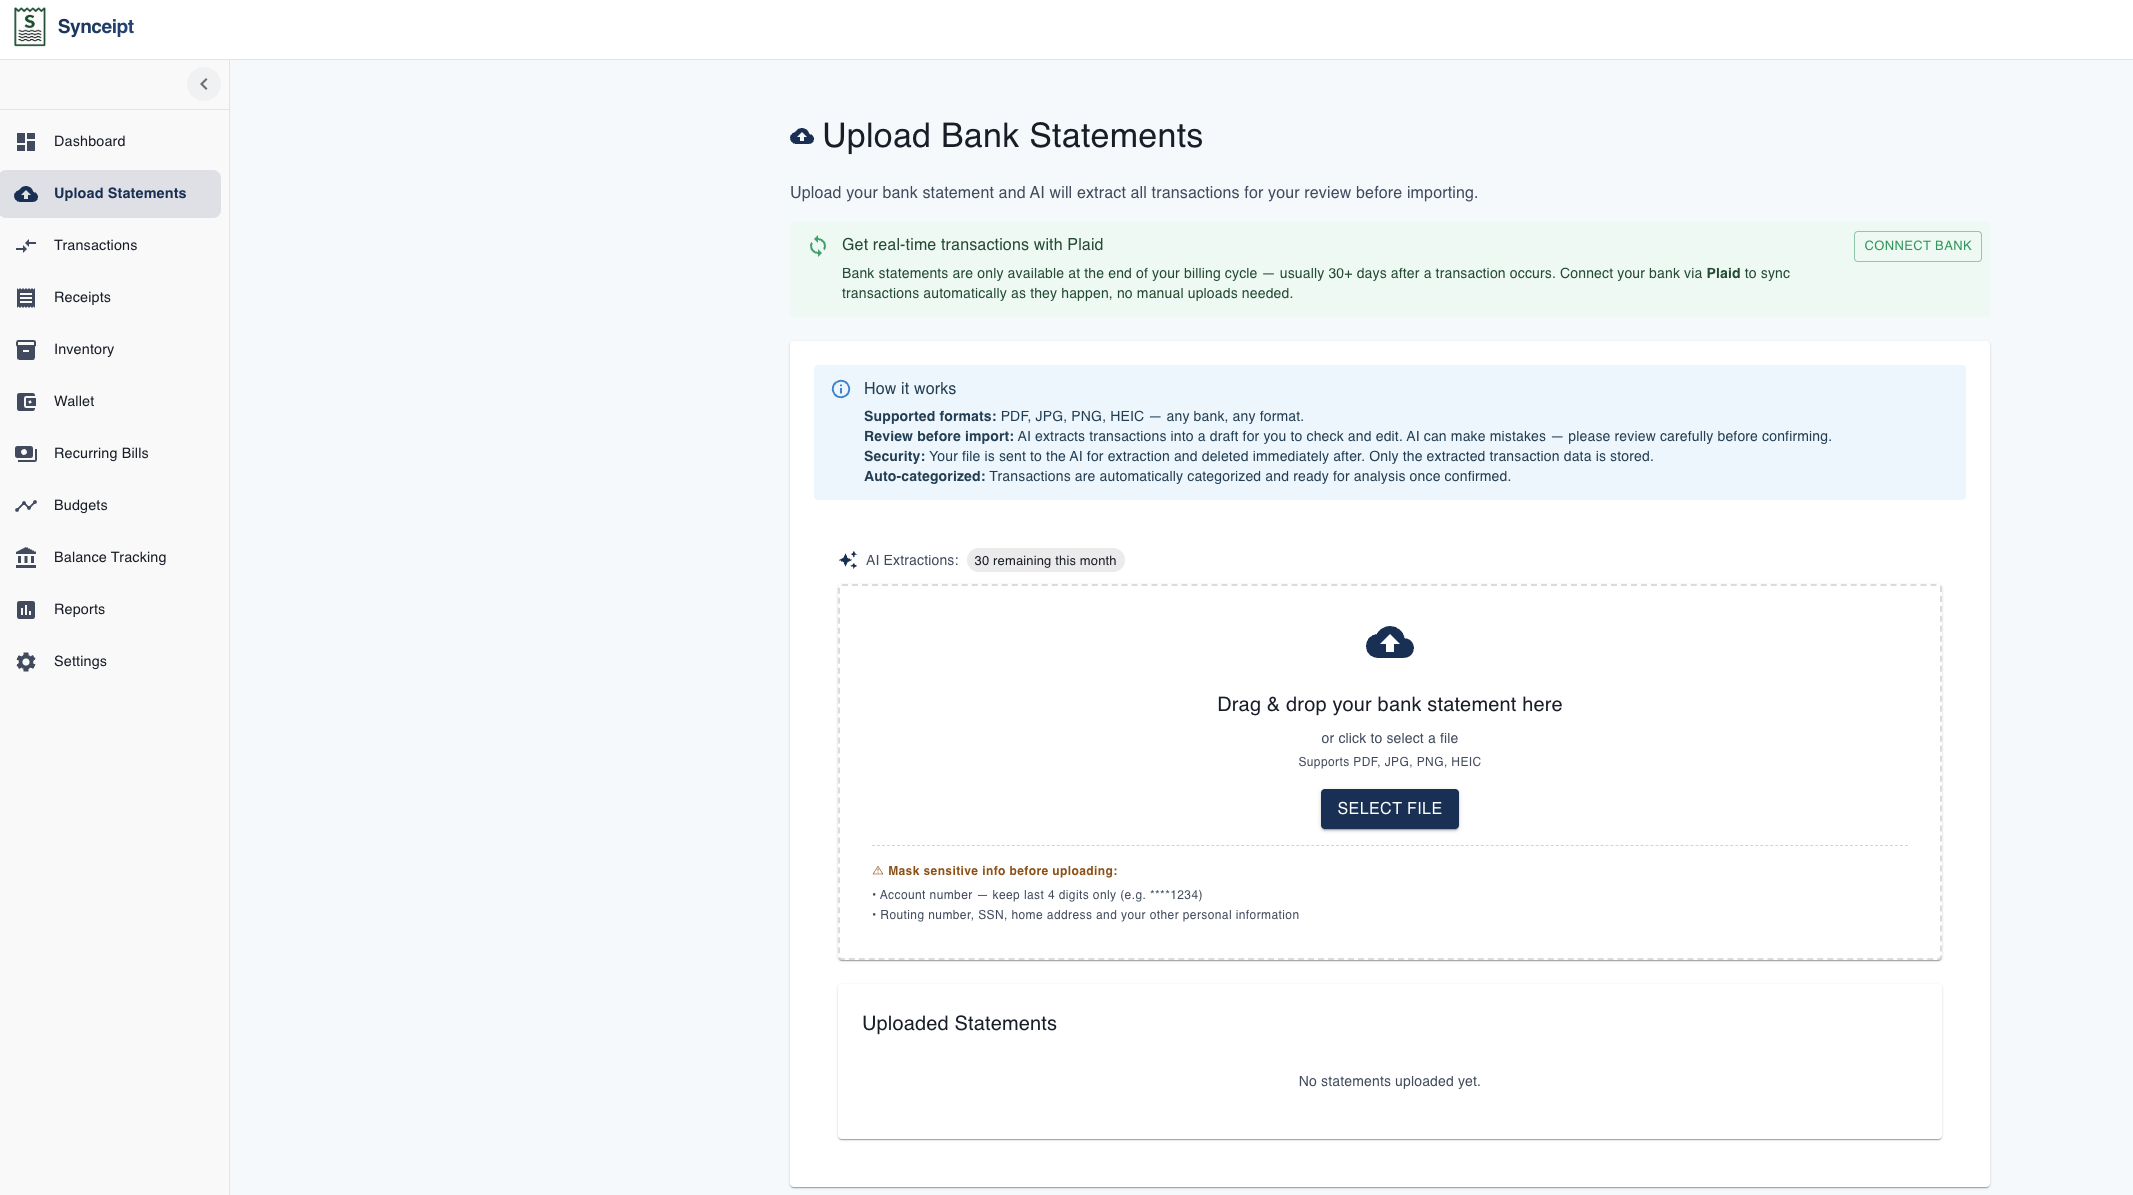
You can upload statements as frequently as you like. This is great if you want occasional updates without a permanent connection.
Manual Entry (No Connections)
If you prefer full control or don't want permanent connections, Synceipt lets you add receipts and transactions manually. Both types have quick action buttons on your Dashboard, Receipts page, and Transactions page.
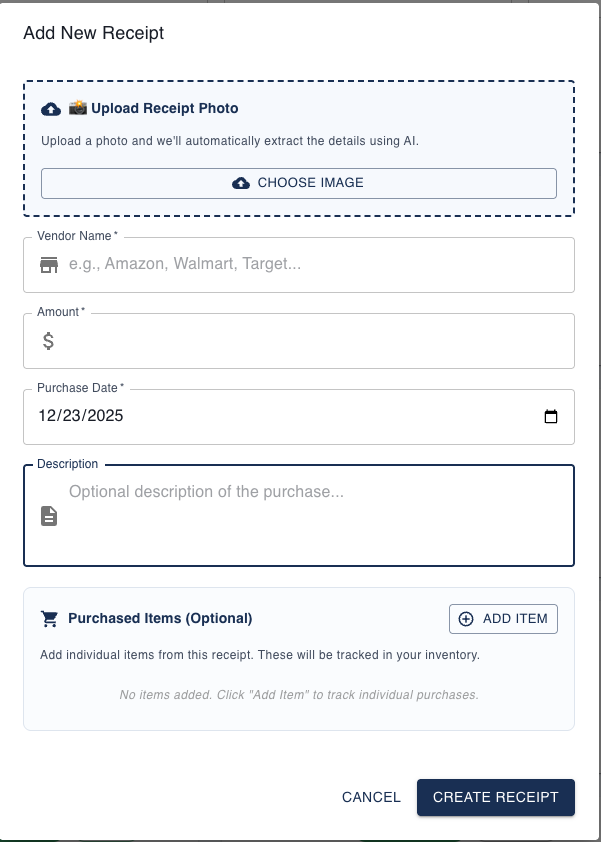
Manual Receipt Entry
Add purchase receipts manually when you have a photo or want to type in the details yourself.
- Click the 'Add Receipt' button (available on Dashboard, or via Receipts → Add Receipt)
- Choose whether to upload a photo or enter the receipt details manually
- Upload an image file if you want Synceipt's AI to extract the merchant, amount, and items
- Enter the merchant name, amount, date, and any purchased items manually if you prefer text entry
- Review the extracted or entered data
- Save the receipt
💡 Capacity Note: Uploading a receipt photo counts toward your plan's monthly photo receipt limit. Manually entering receipt details (text only) is unlimited for all plans.
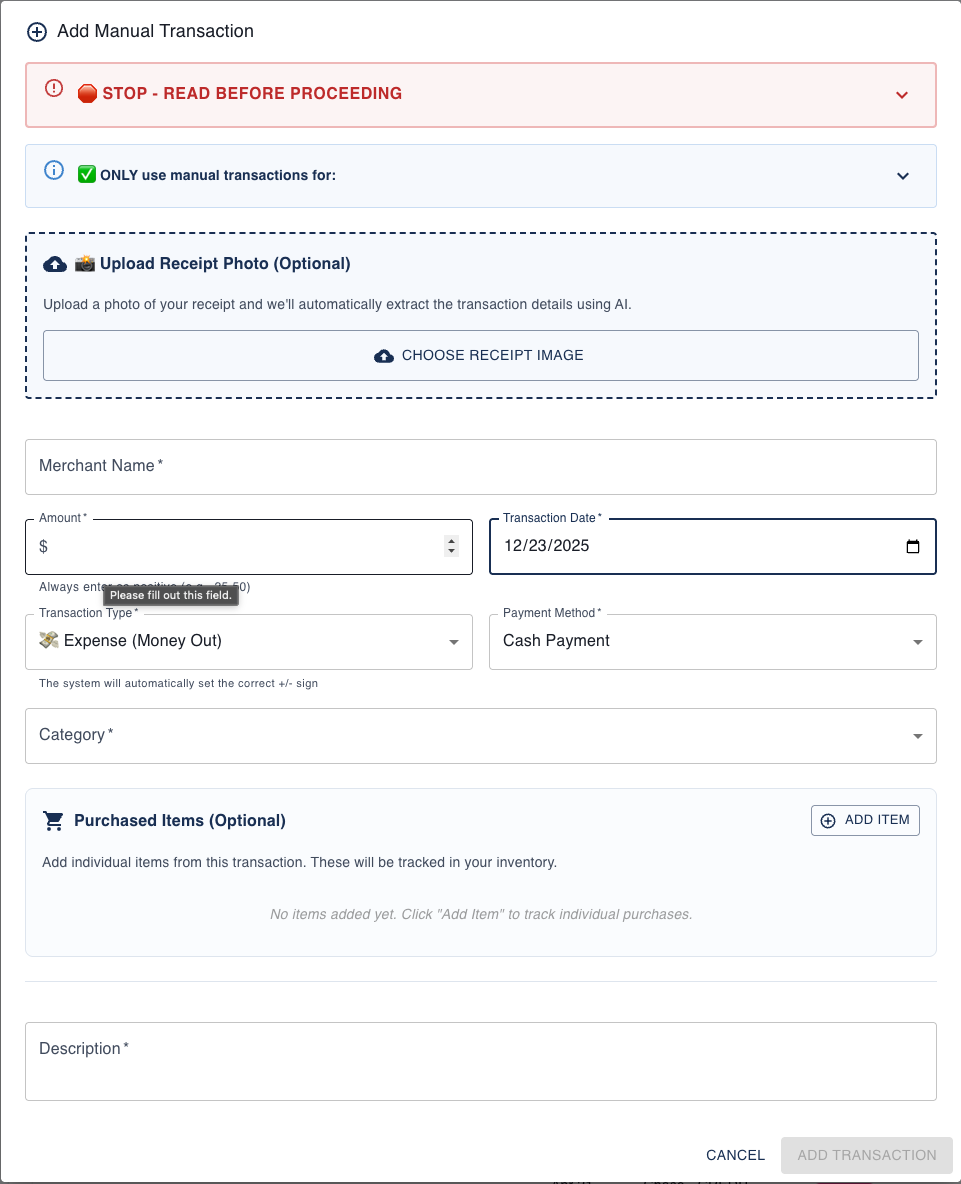
Manual Transaction Entry
Add standalone transactions when you don't have a receipt or want to track a charge separately.
- Click the 'Add Transaction' button (available on Dashboard and Transactions page)
- Enter the transaction details:
- • Merchant name (e.g., 'Whole Foods', 'Shell Gas Station', 'Uber')
- • Amount
- • Date of transaction
- • Category (optional, e.g., 'Groceries', 'Gas', 'Transportation')
- Optionally attach a receipt photo if you have one
- Save the transaction
💡 Capacity Note: Manually entering transaction details (text only) is unlimited for all plans. Attaching a receipt photo does count toward your photo receipt limit.
Both manual receipt and transaction entry methods provide full control over your financial data. Use them as your primary method, or as a supplement to automatic connections when you need flexibility.
Privacy & Security
All data is encrypted in transit and at rest. We follow industry-standard security practices:
- OAuth 2.0 for email (your password is never sent to us)
- Plaid for banking (we follow Plaid's financial-grade security)
- AES-256 encryption for stored data
- HTTPS for all data in transit
- No selling or sharing of financial data with third parties
Troubleshooting Connection Issues
- My bank isn't showing up in Plaid's search
- Not all banks are supported by Plaid. If your bank isn't available, upload PDF statements manually instead.
- I've reconnected my email but old receipts aren't showing
- Email connections sync future receipts by default. To pull in historical emails, click the 'Sync Email Receipts' button on the Dashboard and use the date range option in the modal. Note: Email extraction counts toward your current month's plan capacity.
- Can I connect multiple email accounts?
- Yes — connect as many as your plan allows. Each will be synced independently.
- What if I disconnect a bank account?
- Existing transactions remain in Synceipt. New transactions from that bank won't sync. You can reconnect later.